
This guide will help you connect Auriteq Flow to Logic Pro.
Step 1: Install and Open the Auriteq App
Install and launch the Auriteq app on your computer.
In the app, select Logic Pro as your DAW.
If you don't see a green light next to "Logic Lua Script", click Connect.

Important: The Auriteq app must be running before you open Logic Pro.
Step 2: Open Logic Pro
Once the Auriteq app is running, open Logic Pro.
Then go to:
Logic Pro → Control Surfaces → Setup
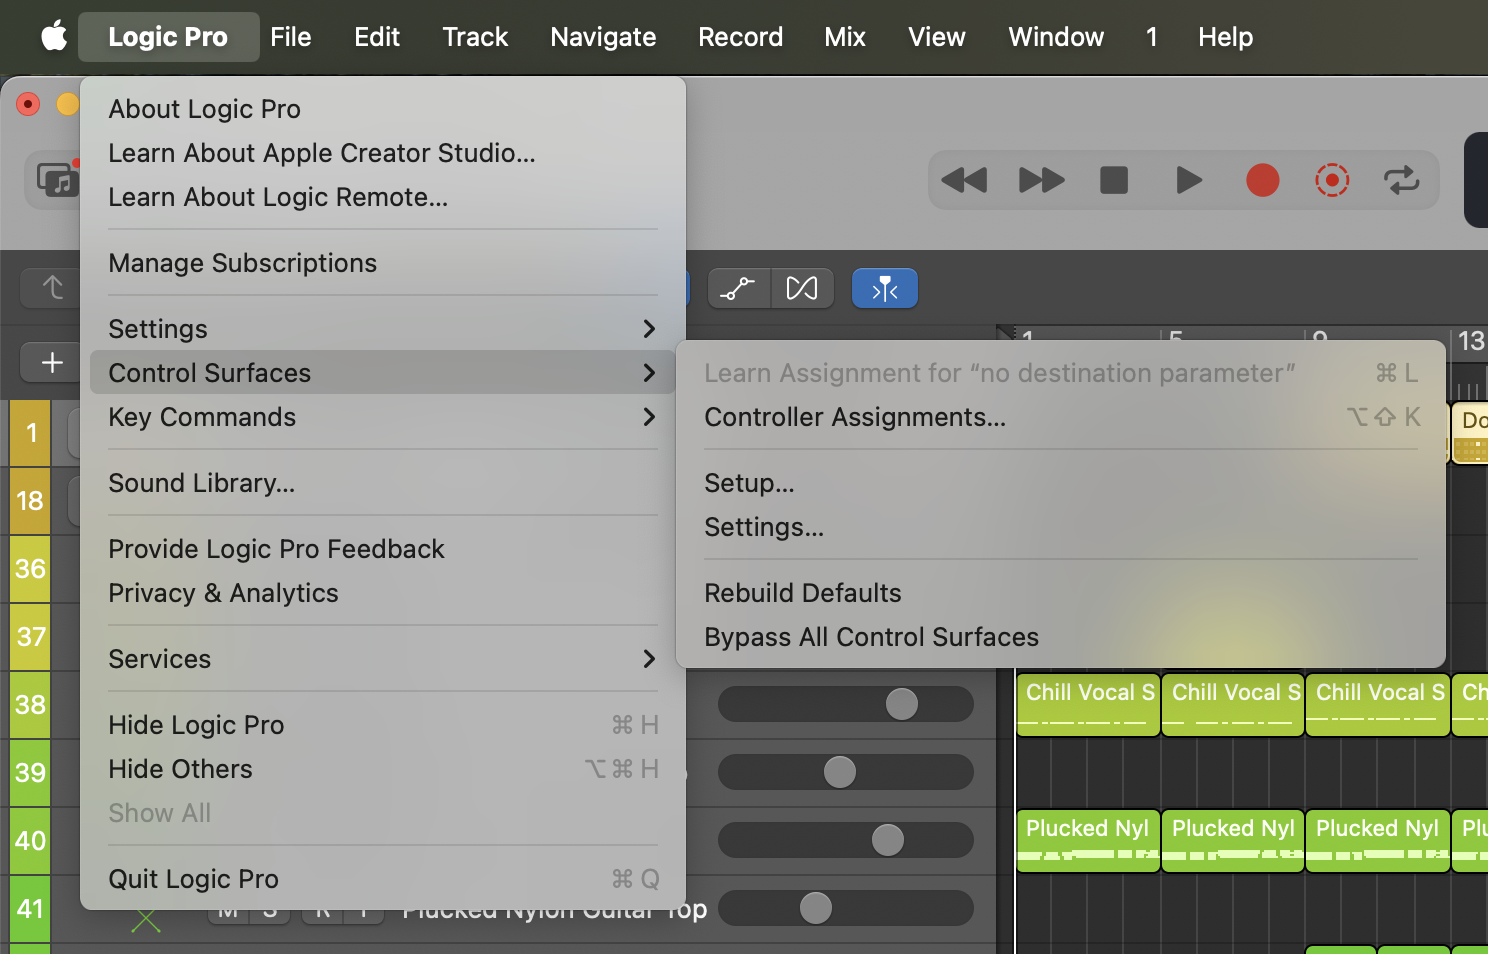
This opens Logic Pro’s Control Surfaces setup window.
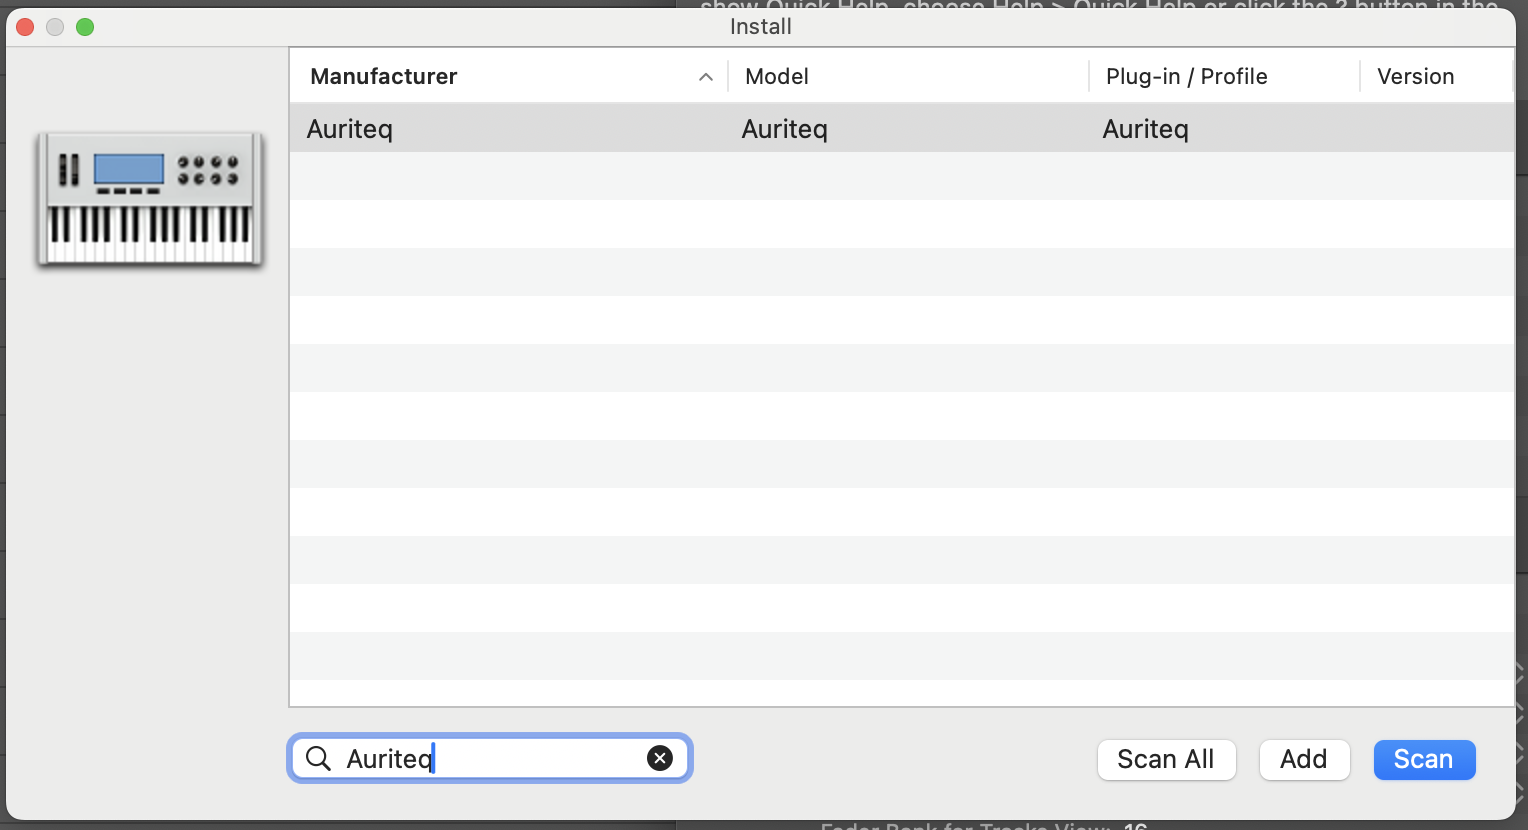
Step 3: Install the Auriteq Control Surface
In the Control Surfaces setup window, click:
New → Install
Search for Auriteq in the list of available control surfaces.
If Auriteq does not appear immediately, click Rescan and search again.
Once Auriteq appears in the list, select it and click Add.
Step 4: Set the Input and Output Ports
After Auriteq has been added, select the Auriteq control surface in Logic Pro’s setup window.
Set both the Input Port and Output Port to Auriteq.
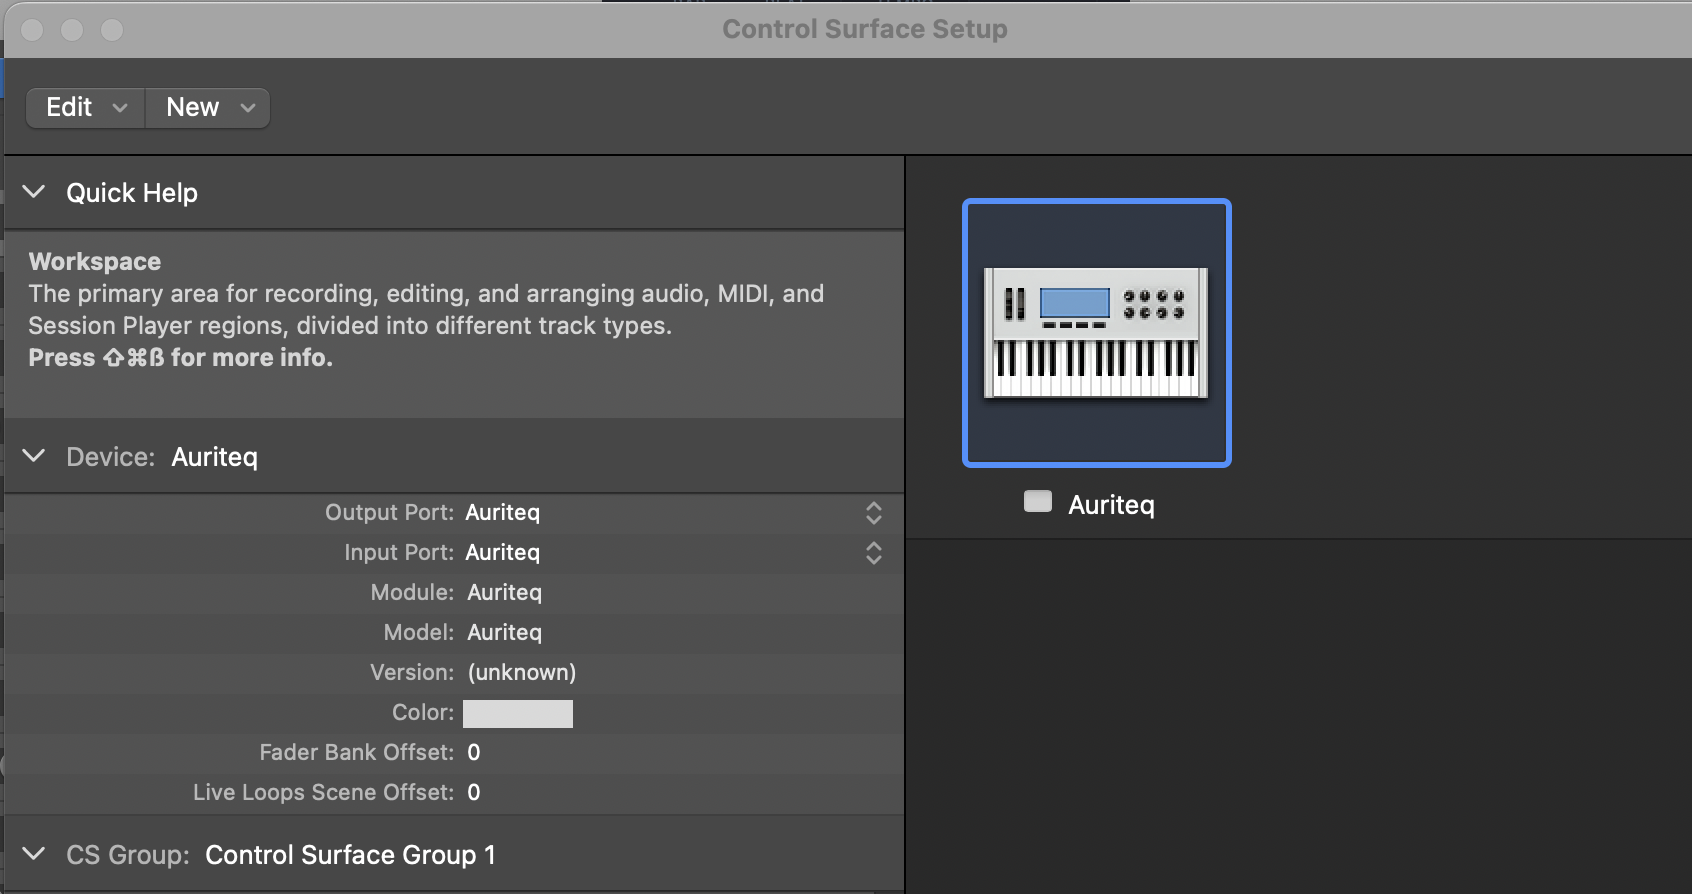
This allows Logic Pro to send and receive the correct MIDI communication from the controller.
Step 5: Confirm the Connection
Once the input and output ports are set correctly, the Auriteq controller should be connected and ready to use with Logic Pro.
The controller screens should display the correct Logic Pro visuals, and the controls should respond inside Logic.
Step 6: Rebuild Defaults
Once everything is connected, click to Logic Pro → Control Surfaces → Rebuild Defaults

Troubleshooting
Auriteq appears in Logic Pro, but the controller does not work correctly - for example, when you try to open a plugin, slots appear empty, or when controlling a plugin, you don't see the parameter names.
In some cases, Logic Pro’s Control Surface preferences can behave unexpectedly. This can prevent our controller from connecting correctly, even if the setup was completed properly.
To fix this, first close Logic Pro.
Then go to the following file on your Mac:
~/Library/Preferences/com.apple.logic.pro.cs
Delete this file.
If you use other controllers with custom mappings and want to avoid losing anything, do not delete the file. Instead, move it to another folder as a backup.
After deleting or moving the file, open Logic Pro again and add the Auriteq controller once more:
Logic Pro → Control Surfaces → Setup → New → Install → Auriteq → Add
Then set the Input Port and Output Port to Auriteq again.
After this, the controller should work correctly, and all plugins should be pre-mapped.
Also make sure that your Auriteq app is up to date. You can check the installed version in the app’s Settings.
Some Logic Pro features do not work, such as track renaming, track recoloring, or plugin insertion
Some advanced Auriteq Flow features in Logic Pro require macOS Accessibility permissions. This includes features such as:
- Track renaming
- Track recoloring
- Plugin insertion
- Certain window or interface control functions
If these features do not work, please check the Accessibility permissions on your Mac.
Go to:
System Settings → Privacy & Security → Accessibility
Then make sure both of the following apps are enabled:
- Auriteq
- Logic Pro
If they are already enabled, turn them off and then turn them on again.
After doing this, restart both the Auriteq app and Logic Pro, then try the feature again.
For plugin insertion, make sure you have added your plugins in the Auriteq app under the Plugin Mappings tab. You can then insert them from the controller using the plugin insertion button.