
This guide will help you connect the Auriteq DAW controller to Ableton Live.
Step 1: Install and Open the Auriteq App
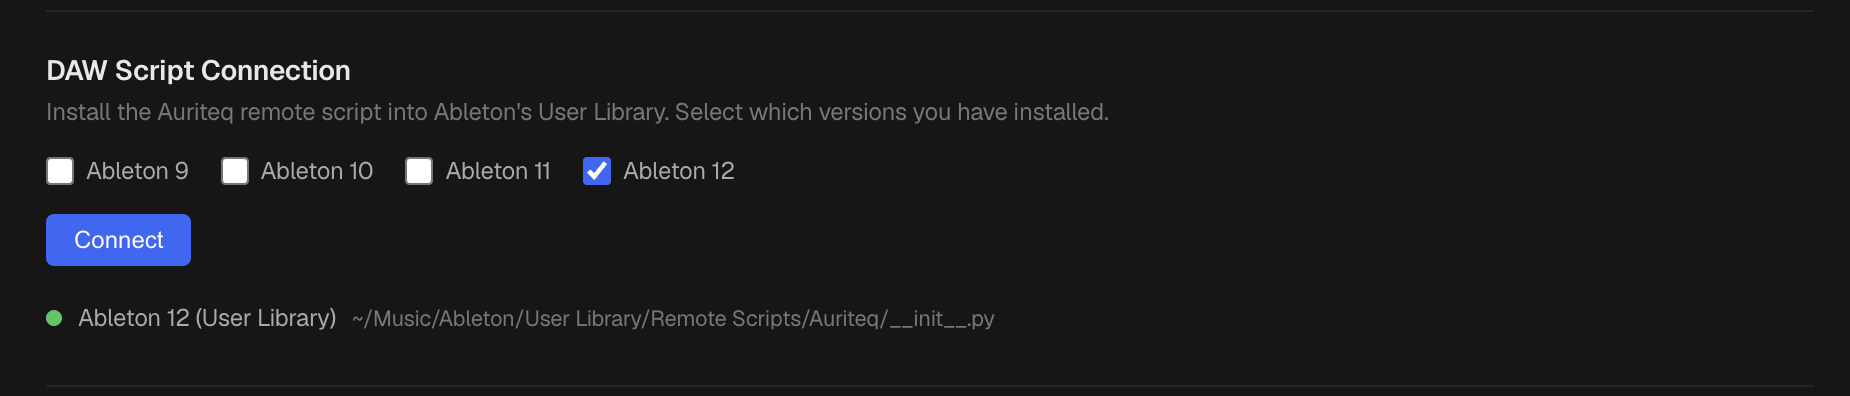
- Install and launch the Auriteq app on your computer.
- In the app, select Ableton Live as your DAW.
- Then go to the Settings tab. If the script does not appear as Connected, click Connect.
This will copy the Auriteq Remote Script to your Ableton User Library, so Ableton can recognize the controller.
Step 2: Open Ableton Live
Restart Ableton Live after installing the DAW script.
Step 3: Select Auriteq as a Control Surface
In Ableton Live, go to:
- Settings → Link, Tempo & MIDI
- Under Control Surface, select Auriteq from the dropdown menu.
- The controller should now be connected and ready to use.
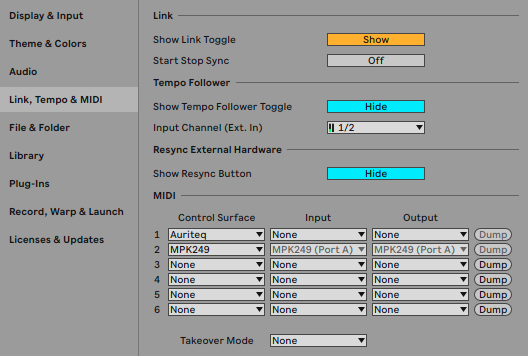
You do not need to set any Input or Output ports for the Auriteq controller.
Step 4: Allow macOS Accessibility Permissions
The first time you use the Plugin Open/Close button, macOS should ask you to grant permission to the Auriteq app.
Please allow this permission when prompted.
This permission is required because this specific function uses a macOS shortcut to open and close the plugin window in Ableton Live.
If macOS does not show the permission prompt, or if the Plugin Open/Close button does not work, please enable the permission manually:
- Open System Settings
- Go to Privacy & Security → Accessibility
- Make sure Auriteq is enabled in the list
- If Auriteq is not listed, click the + button, add the Auriteq app, and enable it
After enabling the permission, restart the Auriteq app and Ableton Live.